Screen printing is an art that allows you to bring your creative designs to life, whether on T-shirts, posters, cups, or more. But did you know that one of the key secrets to great screen printing is keeping your screens clean? It might not sound glamorous, but it’s the backbone of producing stunning prints.
Cleaning your screen printing screens isn’t just about tidying up; it’s about ensuring your prints look sharp and crisp. It’s like keeping your paintbrush clean before creating a masterpiece.
A clean screen directly impacts the quality of your prints. If your screen is dirty or has ink remnants, your prints can look messy and smudged. No one wants that! So, how to clean a screen printing screen?
In this guide, we’ll break down the simple yet crucial process of cleaning your screen printing screen, step by step. We’ll go from gathering the materials you need to the final rinse, ensuring your screens stay in top shape for all your printing adventures.
So, let’s dive in and make your prints shine!
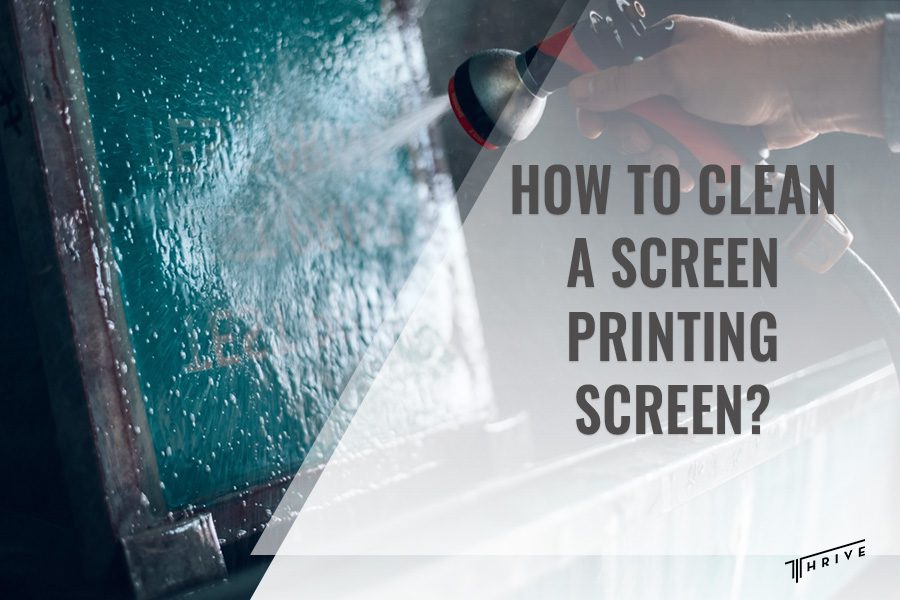
How to Clean a Screen Printing Screen
To clean a screen printing machine, you’ll want to start by removing any excess ink and tape. Then, use a screen degreaser and scrub to remove any oils or residues.
After a thorough rinse, apply an emulsion remover and scrub again. Rinse once more to remove all chemicals, and finish by drying the screen properly for future use.
However, before you can learn how to clean a screen printing screen in detail, you should gather all the necessary tools for the process. We have compiled a list so that you can gather the right equipment before you get started with the cleaning process.

Process Overview
List of necessary materials and tools
- Gloves – Protect your hands from cleaning chemicals.
- Screen degreaser – This helps remove oily residues from the screen.
- Emulsion remover – Used to dissolve emulsion and ink on the screen.
- Scrub brush – Ideal for agitating and scrubbing the screen.
- Hose or pressure washer – Needed for rinsing the screen.
- Squeegee – Use it to remove excess water.
- Soft cloth or paper towels – Essential for drying the screen.
- Clean workspace – Create a clean and well-ventilated area to work safely.
Preparing the work area
First, you need to choose a clean and well-ventilated workspace. You don’t want dust or dirt particles on your freshly cleaned screens affecting your prints. Good ventilation also helps disperse any fumes from the cleaning chemicals, making the workspace safer.
Furthermore, screen cleaning can get messy, so protecting surrounding surfaces and materials from any splashes or drips is essential. Cover your work table with plastic sheeting or disposable drop cloths. Ensure nearby materials or equipment are safely out of the cleaning area to prevent accidental damage or contamination.
With these preparations in place, you’re all set to embark on the screen-cleaning journey. Keep your workspace tidy and safe, and you’ll be well on your way to achieving clean and crisp prints.
Cleaning Methods
Dry cleaning
- Removing excess ink and debris: Before diving into wet cleaning, start by removing excess ink and debris from the screen. You can use a spatula or your gloved hands for this step. Gently scrape away any build-up while being careful not to damage the screen.
- Using a brush and vacuum method: Following the removal of loose ink and debris, employ a soft brush to sweep across both sides of the screen. This helps dislodge any remaining particles. Consider using a vacuum cleaner with a nozzle attachment to suck up fine dust and particles for a more thorough cleaning. Dry cleaning sets the stage for more effective wet cleaning.
Wet cleaning
- Choosing the right cleaning solution: Selecting the appropriate cleaning solution is crucial. The choice should depend on the type of ink and emulsion used. Different inks and emulsions may require specific cleaning solutions. So, always refer to product labels for guidance.
- Applying the solution to the screen: Once you’ve selected the right cleaning solution, apply it generously to both sides of the screen. You can use a spray bottle for an even application or a clean cloth soaked in the solution. Ensure that the solution covers the entire screen surface.
- Scrubbing and agitating the screen: With the cleaning solution in place, gently scrub the screen using a scrub brush or a soft sponge. Pay particular attention to areas with visible ink or emulsion residues. The cleaning solution will begin breaking down these substances. Agitate the solution, allowing it to work its magic.
- Rinsing and inspecting for residue: Thoroughly rinse the screen with a hose or pressure washer after scrubbing. Continue rinsing until all traces of the cleaning solution have been removed. Don’t forget to check both sides of the screen for any remaining residue. A clean screen should feel smooth to the touch.
Drying and reclaiming
Once your screen has been cleaned, it’s essential to ensure it’s adequately dried to prevent any issues in future print jobs. Here’s how to do it:
- Use a squeegee to remove excess water from both sides of the screen.
- Allow the screen to air dry in a clean and dust-free area, ensuring it’s entirely dry before storing or using it for printing. This typically takes a few hours to overnight, depending on the humidity and ventilation in your workspace.
Furthermore, if you plan to reuse a screen for a different design or job, the process of reclamation is essential. Here are the steps:
- Apply a stencil remover or emulsion remover to both sides of the screen.
- Let the remover sit for the recommended time as per the product instructions.
- Use a high-pressure washer to rinse off the emulsion and stencil, ensuring you’ve removed all traces.
- Dry the reclaimed screen before storing or using it again.

How to Deal With Stains and Stubborn Ink
Identifying common screen stains
Different types of stains can mar your screens, including ink smudges, ghost images, and emulsion stains. Identifying the nature of the stain is the first step in effective stain removal. Carefully inspect the screen to determine the type of stain you’re dealing with.
Specialized stain removal techniques
Depending on the type of stain, you may need specialized stain removal techniques. For instance, ghost images may require the use of stain removers formulated to target emulsion residues, while ink smudges may respond better to a specific ink stain remover.
Removing dried or stubborn ink
Dried or stubborn ink can pose a significant challenge. In such cases, you may need to employ a combination of methods. This could include pre-treating the stain with stain removers and allowing it to soak in a cleaning solution for an extended period.
What Are Dip Tanks?
Dip tanks are specialized containers used in screen printing to efficiently remove emulsion and ink from screens. They contain solutions for breaking down emulsion and ink, making it easier to clean screens for reuse.
Dip tanks often have automation features for efficiency and are environmentally friendly, reducing waste and resource use. They are commonly used in commercial screen printing operations.
Best Practices for Extending Screen Life
To maximize the lifespan of your screens, you can adopt these practices:
- Avoid abrasive scrubbing during cleaning to prevent screen mesh damage.
- Handle screens with care to prevent dents, tears, or other physical damage.
- Use high-quality emulsions and inks to reduce the wear and tear on screens.
- Regularly inspect screens for signs of wear, such as pinholes, and address any issues promptly.
If You Want to Learn More: What Do You Need for Screen Printing?
Frequently Asked Questions
How do I clean a stained screen printing screen?
To clean a stained screen printing screen, start by identifying the type of stain. Different stains may require specific approaches. For most stains, you can follow these steps:
- Apply an appropriate cleaning solution (such as a stain remover or emulsion remover) to the stained area.
- Allow it to sit for the recommended time per the product instructions.
- Gently scrub the area with a soft brush or sponge.
- Rinse the screen thoroughly to remove any residue.
How do I remove dried ink from a screen?
Removing dried ink from a screen can be challenging, but it’s possible. You should do the following:
- Apply a dedicated ink remover or a mixture of water and mild detergent to the dried ink.
- Allow it to sit for a few minutes to soften the ink.
- Use a brush or sponge to gently scrub the dried ink, being careful not to damage the screen.
- Rinse the screen thoroughly to remove any remaining ink and cleaning solution.
What degreaser should I use for screen printing?
Choosing the proper degreaser depends on your specific needs, but a standard screen degreaser should work well for most screen printing applications. Look for one that is suitable for the type of ink and emulsion you are using.

Conclusion
In the world of screen printing, the journey doesn’t end with the final print. It extends into the care and maintenance of your valuable tools – the screens. Ensuring proper drying, reclamation for reuse, and responsible waste disposal may guarantee that your screens remain ready for the next creative endeavor.
Now that you know how to clean a screen printing screen, create a regular screen cleaning schedule, take proper precautions while storing your screens, and adhere to the best practices to extend screen life.
These steps are not just about maintaining the longevity of your screens; they are the foundation upon which every vibrant print is built.
Robert Fisher is the founder and CEO of Thrive Screen Printing and brings extensive experience in the screen printing and fulfillment industry.